Restore Old Photos with AI
Scratches, creases, stains, torn corners, faded color and that orange 1970s cast — repaired in about ten seconds, with the people in the photo kept exactly as they were. Try a free HD preview on your own scan below.
Old prints fail in predictable ways: the emulsion cracks into hairline scratches, folds leave bright creases, humidity leaves brown stains, dyes fade toward yellow and orange, and the scan or phone photo you make of the print adds its own blur and grain. None of that is the photo — it's damage sitting on top of it.
Generative restoration separates the two. The HD tier removes scratches, creases, dust, stains and torn edges, rebuilds the surface underneath, corrects faded and yellowed color (or keeps a black-and-white print black-and-white), and sharpens faces and fabric — under a fixed instruction that forbids changing anyone's face, age, expression or clothing. The examples further down were made by this exact tool from deliberately damaged test photos.
- 01
Scan or photograph the print
A flatbed scan at 600 dpi is ideal; a straight-on phone photo in indirect daylight works well too. Read the scanning tips below if you want the best result.
- 02
Run HD restoration
HD is pre-selected on this page — it's the tier that actually removes damage. Guests get a free locked preview; unlock the full-resolution result with credits. Standard is available for prints that are merely faded or soft.
- 03
Compare, download, share
Drag the slider to check every face, then download the full-resolution file with no watermark. Reprint it, frame it, or send it to the family group chat.
Drop a pixelated image here
JPG, PNG or WebP · up to 10MB
or paste from clipboard (⌘V)
Real restorations from this tool
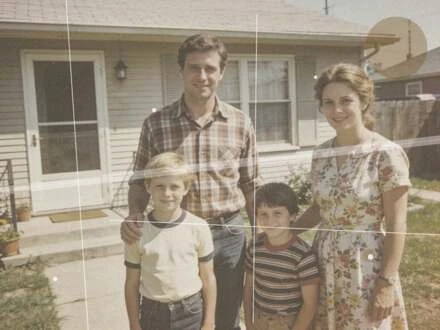
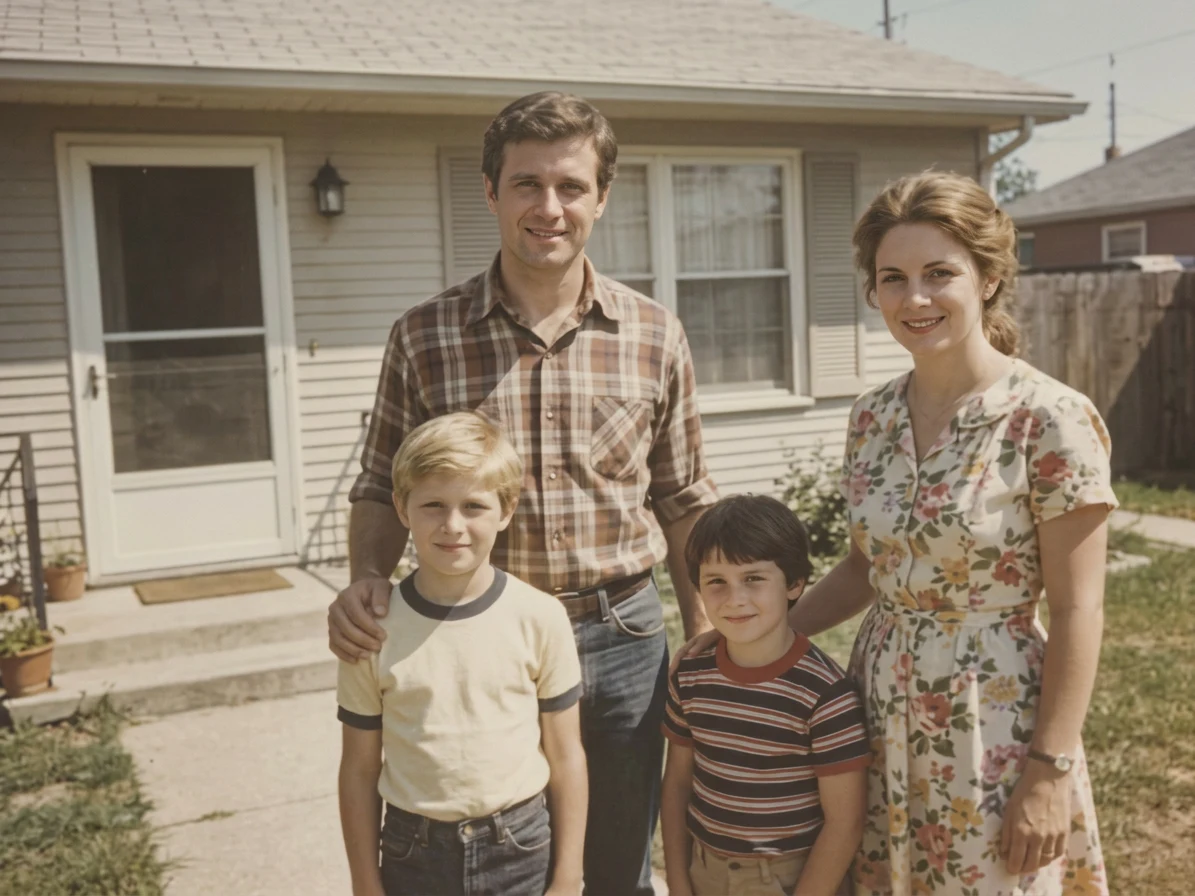
A 440-pixel family snapshot with a diagonal crease band, three scratches, dust spots and a stain. HD removed every mark, pulled the color back from orange to natural skin tones and grass green, and kept all four faces exactly as they were.
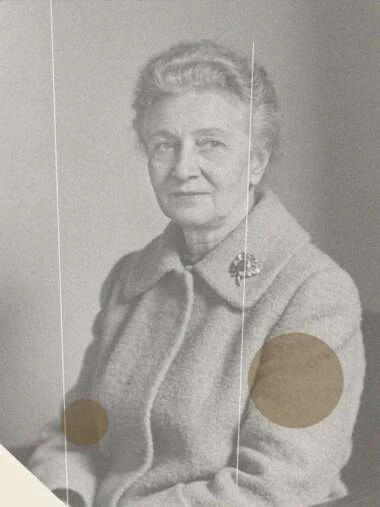
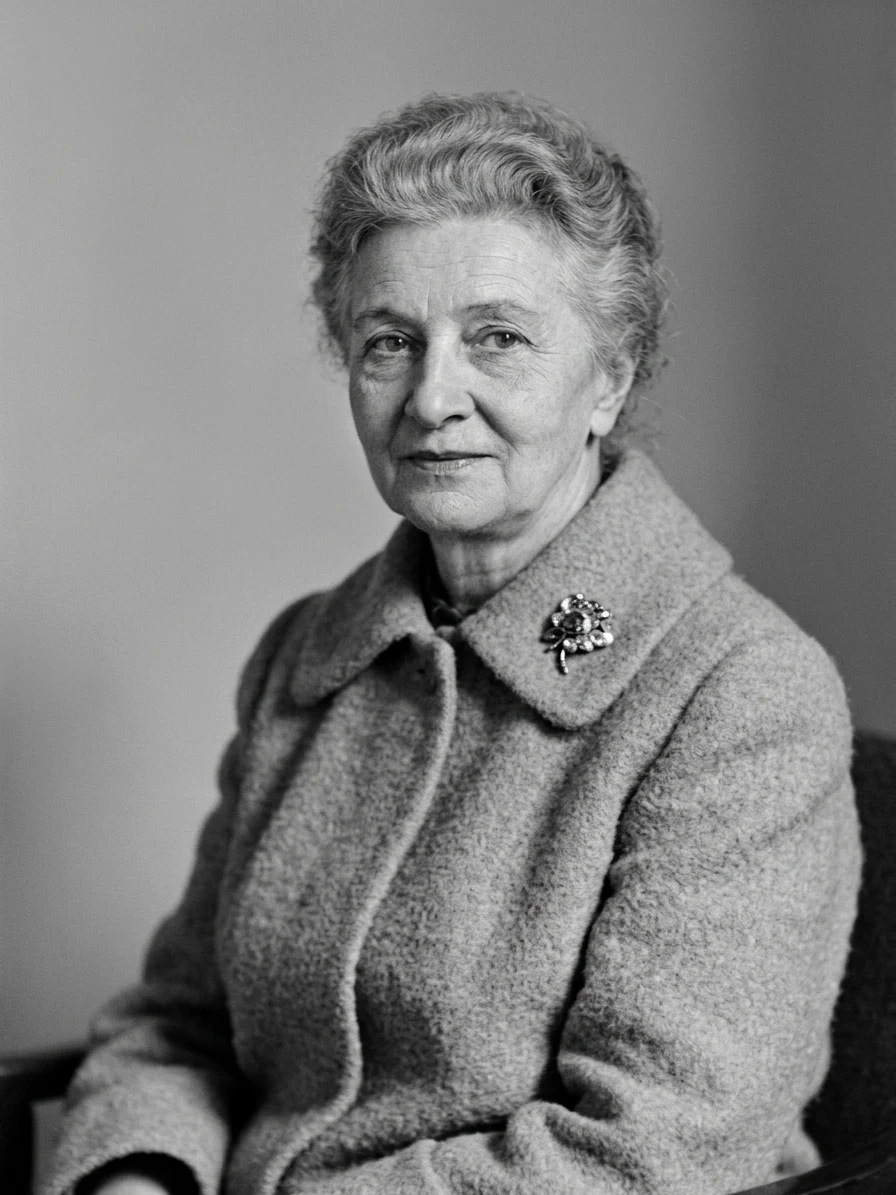
A 380-pixel print with two brown stains, two scratches and a missing corner. HD repaired the damage, filled the corner, restored neutral black-and-white tones — no colorizing — and sharpened the hair, brooch and wool texture.
Both source photos are AI-generated period-style images (no real people), deliberately damaged — scratches, creases, stains, yellowing, a torn corner — and reduced to the sizes shown. Outputs are the untouched HD results.
What it fixes
The restoration instruction targets the damage types that show up on nearly every print older than a few decades.
Scratches & hairlines
Fine bright or dark lines from handling and emulsion cracks are removed and the detail beneath is reconstructed.
Creases & fold lines
The pale band a folded print leaves behind — including across faces — is repaired without smearing the surroundings.
Dust, specks & spots
White specks from the scanner glass and dark spots from the print itself are cleaned up in one pass.
Stains & water marks
Brown humidity stains and tide marks are removed; skin and fabric underneath are rebuilt in the surrounding tones.
Torn corners & missing edges
Small missing areas at the edges are filled plausibly. Large missing areas are inferred — see the limits section.
Fading & low contrast
Contrast and depth are brought back so blacks are black again and mid-tones separate.
Yellow & orange cast
Dye-shift from the 1960s–90s is corrected to natural color. Black-and-white photos are kept black-and-white.
Grain, blur & low resolution
Scanner grain and softness are reduced and the image is upscaled, so a small print becomes a clean 1K or 2K file.
Faces & fine detail
Eyes, hair, fabric weave and jewelry are sharpened — while the instruction forbids changing identity, age or expression.
The prints people bring here
Family portraits and group shots
The wall-frame photos with a crease through Grandpa's forehead and forty years of fading. Group photos benefit most: every face is restored in one pass.
Wedding and anniversary prints
Studio prints from the 1950s–80s: usually well exposed, usually creased or stained from the album. Restoration brings back the dress detail and the lace.
Baby and childhood photos
Small prints handled constantly, so scratches and fingerprint stains are the norm. Keep the original scan — the restored copy is for printing and sharing.
School, military and ID-era portraits
Formal black-and-white portraits with a torn corner or a stain. The tool keeps them monochrome and neutral rather than guessing at colors.
Kodachrome, Polaroid and drugstore prints
The classic orange cast and washed blacks of aging color dyes are exactly what the color correction step targets.
Photos of photos
No scanner? A straight-on phone photo of the print works. Restoration also cleans up the glare-free but slightly soft result a phone gives you.
Scanning tips that make a real difference
Restoration works with what's in the file. A few minutes at the scanner is worth more than any setting in the tool.
- 01
Scan at 600 dpi, flat, glass cleaned
600 dpi captures the grain of the print, which the model uses to tell detail from damage. Wipe the glass first — every speck becomes a spot to remove.
- 02
Phone photo: indirect light, no flash, straight on
Shoot near a window with the print flat on a table, fill the frame, and hold the phone parallel to the print. Flash creates a glare hotspot the model has to guess through.
- 03
Don't pre-edit
Skip the sharpen and auto-color filters. They bake in artifacts the restoration then has to work around; the raw scan restores better.
- 04
Save as PNG or a high-quality JPG
Heavy JPEG compression adds blocky artifacts around every scratch. If your scanner offers TIFF, convert it to PNG before uploading (10 MB limit).
- 05
Small is still fine
Even a 300-pixel copy of a print — the two examples above are 380 and 440 px wide — restores well. Long edges above 2048 px are downsized before processing.
Standard vs HD on old photos — the honest version
On this page HD is pre-selected, because it is the only tier that removes damage. Standard is a fast upscaler: it reduces grain and softness and doubles the resolution, but scratches, stains, creases and yellowing stay exactly where they are. Use Standard for a print that is merely small or slightly soft; use HD for anything with marks on it.
Guests can run HD as a free locked preview to see whether their photo responds before spending anything. Unlocking the full-resolution file costs the normal HD credits, and a failed run is never charged.
Honest limits
Large missing areas are inferred
A torn-off corner of sky or wall is filled convincingly. A torn-off half of a face is a reconstruction — plausible, not a recovery. The instruction forbids inventing new people or objects, but for genealogy or evidence, treat filled areas as illustration.
No colorization — by design
Black-and-white prints stay black-and-white. Colorizing means guessing the color of a dress or eyes that were never recorded; that is a different product with different honesty problems, and we don't mix it into restoration.
Severe mold, emulsion loss and double exposure
Where the image layer is physically gone over a wide area, or two frames overlap, the result is a guess. Try the free preview — sometimes it works surprisingly well, sometimes it's clearly a reconstruction.
Identity is preserved, not certified
Faces are sharpened under a strict keep-identity instruction and in our tests they stayed recognizably the same people. Still, this is generative restoration: compare the slider carefully on every face before you reprint.
Old photo restoration: FAQ
More than old photos?
The same engine sharpens low-resolution photos of any age and makes blurry text readable again.