Remove Glare from Photos with AI
Reflections on glasses, a white flash spot on a framed print, the window mirrored across a glass cabinet — the AI removes the reflection and rebuilds what was underneath, without touching anything else in the photo. One free run, no account needed.
Glare is a lighting problem, not a resolution problem. A sharp, high-resolution photo can still be ruined by a bright reflection: the lens of a pair of glasses mirrors a window and hides an eye, a camera flash bounces off a glossy print or a laminated ID, sunlight blooms across a glass frame or a phone screen. No amount of upscaling or sharpening fixes that — the pixels under the reflection are simply gone.
This tool uses an instruction-following edit model with one fixed instruction: remove the glare, reflections and hotspots, restore what was hidden underneath, and change nothing else. Faces, framing, colors and the rest of the lighting stay as they were. The examples below were produced by this exact tool from deliberately shot test photos, and the tool runs in about fifteen seconds.
- 01
Upload the photo
JPG, PNG or WebP up to 10 MB. Use the original file where you can — a screenshot of the photo compresses the very detail the AI needs to work with.
- 02
Pick Standard or HD
Standard is free once a day for guests and handles most glasses and flash cases. HD gives cleaner lens edges and more natural skin under the reflection, and outputs up to 2K for prints.
- 03
Compare and download
Drag the slider to check the eyes or the area under the hotspot, then download the full-resolution file. No watermark.
Drop a photo with glare here
JPG, PNG or WebP · up to 10MB
or paste from clipboard (⌘V)
Real results from this tool


Both lenses mirrored a bright window and hid the eyes. The reflection is gone, the eyes are restored, and the thin metal frame, skin texture and background are untouched.
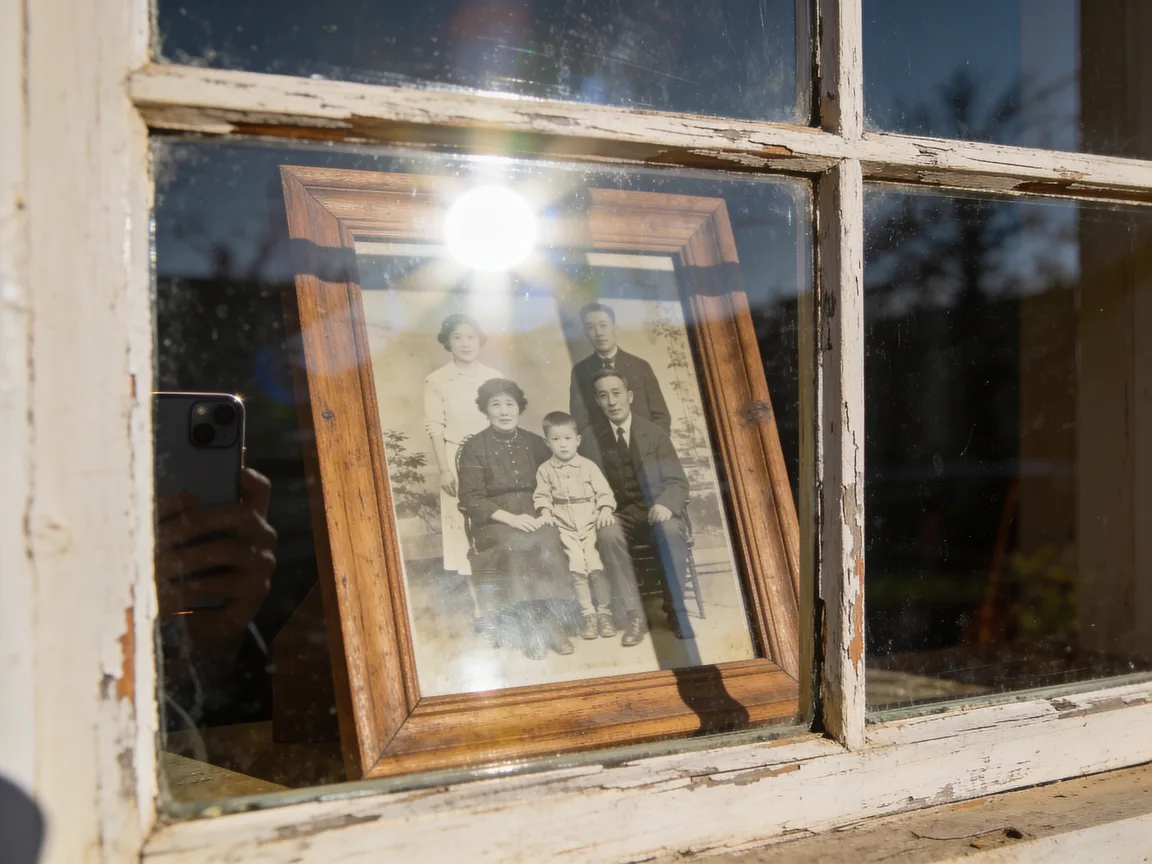
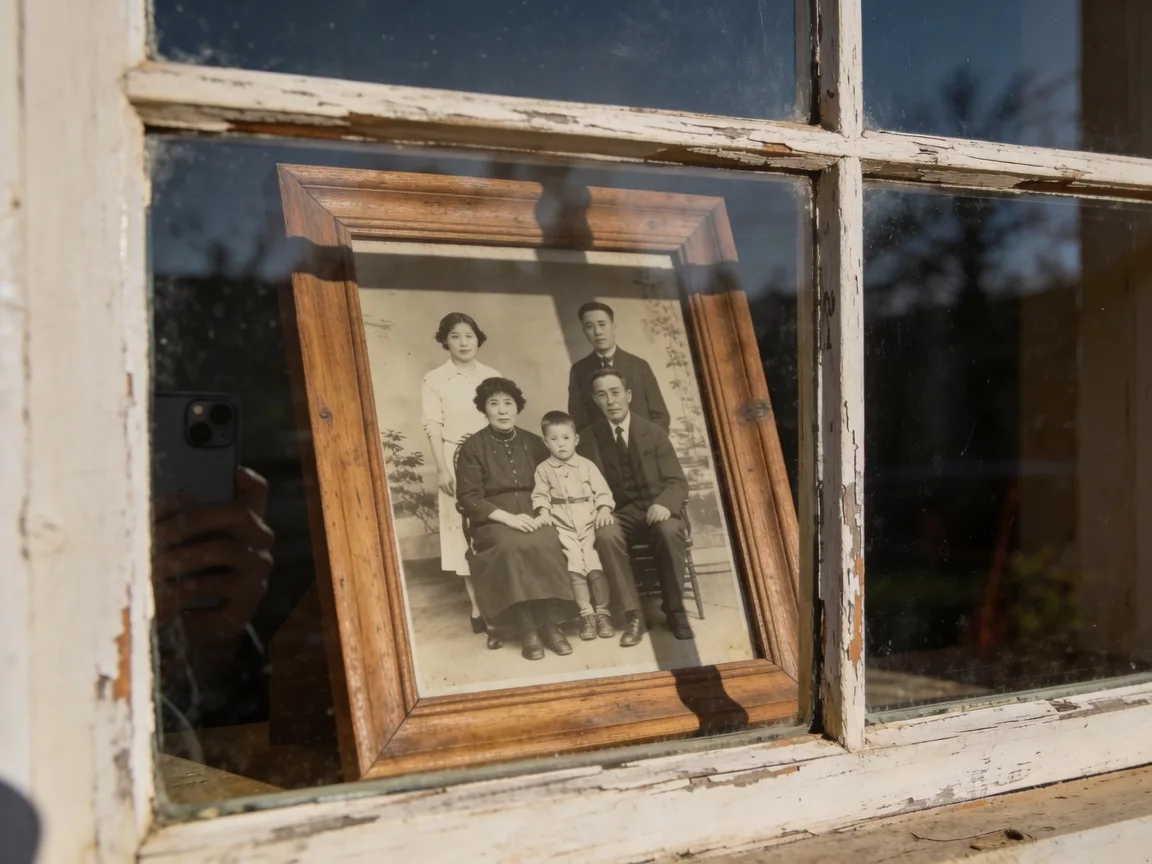
A phone photo of a family portrait behind glass, with a blown-out sun spot over the top of the print. The hotspot is removed and the print underneath rebuilt; the frame, window and the remaining faint reflections stay as they were.
Both source photos are AI-generated test images (no real people), shot to include typical glare. Results are unedited HD output from this page.
What glare removal fixes
Six kinds of reflection this page is built for. Each one is a bright patch that hides real content — the AI removes the patch and restores the content.
Glasses reflections
Windows, ring lights or a flash mirrored in the lenses. The eyes behind them are restored so the person looks at the camera again.
Flash hotspots
The white blob a camera flash leaves on a glossy print, a laminated card, a whiteboard or a wet surface.
Window and glass reflections
A room or a person mirrored across a shop window, a picture frame, a display cabinet or a car window.
Screen glare
Light spilling across a phone, monitor or TV screen you photographed, hiding what was on the display.
Sun flare and blooms
Bright sunlight blooming across part of the frame, washing out color and detail in that area.
Shiny skin and forehead glare
Oily highlights from harsh light on a forehead, nose or cheeks — toned down to natural skin, not blurred.
When you need it
Portraits of people who wear glasses
Ring lights and windows are the classic culprits: the lens becomes a mirror and the eyes vanish. Retaking the shot is not always possible — the wedding is over, the grandparent lives abroad. Glare removal gives you the version where the eyes are visible.
Photographing framed prints and old photos behind glass
The fastest way to digitize a framed photo is to shoot it on the wall, but the glass throws back the room, the window and your phone. Remove the reflections here, then restore the print itself with the old photo tool if it is also faded or scratched.
Product and listing photos
Glossy packaging, watches, phones and glass bottles pick up the light source. A clean shot without the hotspot sells better and matches the rest of the listing.
Documents, cards and whiteboards
A flash bouncing off a laminated ID, a certificate or a whiteboard hides part of the text. The reflection is removed so the page is readable — see the limits below on using such images as evidence.
How to avoid glare next time
Removal works, but the best glare is the one you never capture. Five habits that cut most of it at the source.
- 01
Move the light, not the subject
Reflections obey geometry: the angle in equals the angle out. Step to the side of a window or a lamp and the reflection slides off the lens or the glass.
- 02
Tilt glasses a few degrees down
For portraits, ask the person to lower their chin slightly or push the frames down the nose a touch. The lens now reflects the floor instead of the light.
- 03
Turn the flash off indoors
On-camera flash is the main source of hotspots on prints, screens and skin. Raise ISO or use a lamp off to the side instead.
- 04
Shoot framed prints at an angle, or take the print out
A slight angle stops the glass mirroring you and the phone; the AI can straighten nothing, but it has far less to remove. If the frame opens, take the print out and photograph it flat.
- 05
Use a polarizing filter for glass and water
A cheap clip-on polarizer kills most reflections from glass, water and glossy paint before they reach the sensor.
Standard vs HD on this page
Both tiers on this page are instruction-following edit models, not upscalers, so both actually remove the reflection. Standard is the fast model: it clears glasses and flash glare well and outputs at up to 1K, which is enough for phone screens and social posts. HD is the higher-quality model: cleaner lens edges, more natural skin and eye detail under the reflection, and output up to 2K when your input is larger than 1024 px.
Guests get one free Standard run per day and a free locked HD preview. Signed-in accounts start with free credits, so the first HD run is usually free as well.
Honest limits
What is under a fully white patch is reconstructed, not recovered
Where the sensor clipped to pure white, no information survives. The AI rebuilds a plausible surface — an eye, a patch of skin, a piece of the print — from the surrounding context. That is the right thing for a family photo and the wrong thing for anything that has to be true, so do not use glare-removed images as evidence, for identification or for medical or legal records.
Eyes behind glasses are the hardest case
When the reflection covers the whole eye, the AI infers gaze, iris color and shape from the other eye and the face. It is usually convincing; it is still an inference. Check both eyes in the comparison slider before you print.
Colored tints and coatings
A strong blue or green anti-reflective coating can leave a faint colored cast on the lens after removal. HD handles this better than Standard.
Reflections that are the subject
If the reflection is part of the picture — a skyline mirrored in a lake, a deliberate mirror shot — the instruction is written to leave scene reflections alone and only remove glare on glasses, glass, screens and glossy surfaces. Results on ambiguous scenes vary.
Frequently asked questions
Remove the glare from your photo
Upload a photo with glasses reflections, a flash spot or a window reflection and see the result in about fifteen seconds.